Vat’s not right!
I promised acid pools, but I also described them as manmade. After staring at an emptied cup of frosting, I decided on vats of acid. I cut the icing cup into three sections, two of them one inch tall, and the other whatever was left. The inside would need some sort of filling. I thought about foam, wood, MDF, and then I remembered I had some acrylic left over from making some tokens. I had the laser cut the circles, peeled of the backing paper, and hot glued them in place. Then I realized I would need to prime the walls of the vat, so promptly placed the backing paper back onto the acrylic.

Laser cut inserts 
are a perfect fit. 
Some priming, 
and we’re ready to rock!


Blending hobbies
Turns out one of my other hobbies has a little crossover into this one. A few ammunition manufacturers sell rimfire cartridges in these boxes with plastic inserts to keep the rounds from rattling around in the box. They make for some neat metal walkways, or some futuristic partitions. Some dowels for poles, then wire glued in place for safety. I thought about making a solid railing, but like the idea of rope, cord, or chain doing the job.


added wheel valve and pipes 
cryxian necrotech?

Pouring, Part 1
I don’t know why, but the big tank took the longest to set up. It did have the advantage of not needing a second pour. I think the paint that I added slowed down the setup. Check out those swirls.

Initial pour. 
Next day, still fluid. 
Day 3, like gelatin.

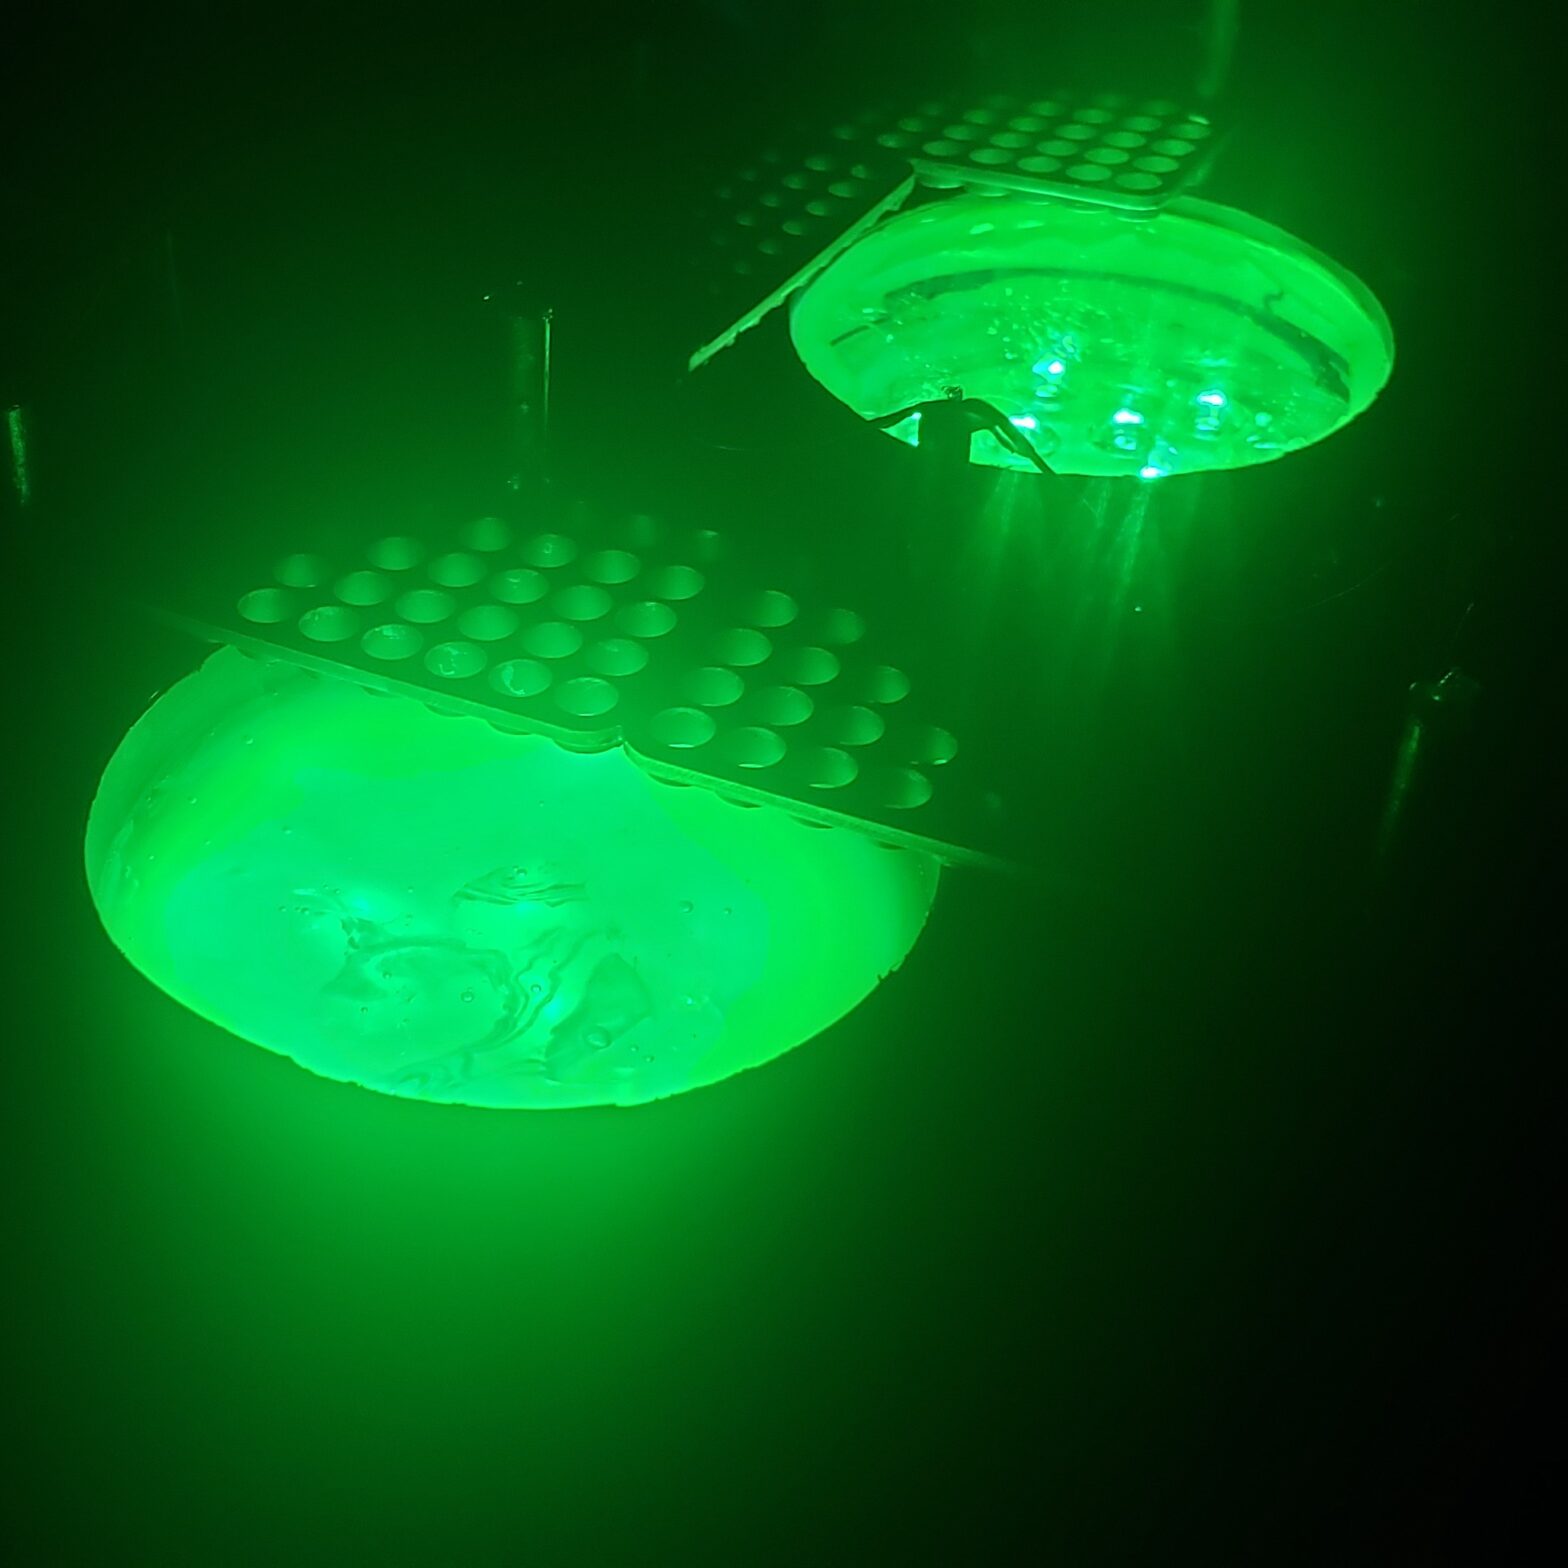
LIGHT ‘EM UP!
At this point, I decided to light up the tanks. There isn’t much better than an acid pit than a glowing acid pit. Amazon had some glowing colored lights that were battery powered, and fit the diameter of the vats. The tall vat looked like it would be perfect, but the other two vats would need to be a little taller.
A piece of square foam with a circle cut inside would help raise the vat while providing a containment area and place for the structure to stand without having to change the supports. The MDF bases received a laser-cut hole in the place where the foam/vat would fit best.

amazon find 
holy wow! 
test fit 
holey base 
so far, so good
Contain that mess!
Test fit done, I hot glued the foam to the base and vat. Tongue depressor sticks with the ends cut off made convincing wood or even metal cladding. A quick spread of glue then ballast fill makes for a convincing gravel pit. The pieces are set aside to dry on parchment paper.

hot glued 
ready to rock 
based 
basing over a bucket 
drying 
hey, look! models in the background


Why the gravel pit?
A long time ago, I worked in an area with massive tanks full of aviation fuel. These tanks were attached to a building, but not directly. They lived in a pit of gravel, and a raised cement structure with a cage on top. The cage on top kept people from falling into the pit, and the cement and gravel provided some containment for the fuel if it were to leak while simultaneously acting as a burn barrier to prevent flames from encroaching on the flammable fuel if the surrounding fields caught fire.
Testing… one, two, three
I mostly like how the vats look so far. They could use some steps, some rivets, and some scoring to make panels on the vats. The rope either needs a topper on the posts, or another solution to make the rope look right. The bases need detail as well.

unlit 
multicolor 
varied 
more colors 
rotating colors 
lights out


I think I will stretch this project out a little. Next week, details on the vats, a pour on the smaller vats, and hopefully all done!