I am really excited about playing the new Infernals faction in the Warmachine/Hordes game by Privateer Press. For those who may have followed a link to the blog because I’m making terrain from foam, Warmachine & Hordes is a tabletop war game. It uses miniatures in a roughly 28mm scale to represent individuals caught up in the violent conflict that continually plagues their homeland. The Infernals are a species of alien life, from beyond the void. Think “Cthulu” mixed with the Alien Covenant and you get the general concept. The Infernals are also an analogue for devils, making bargains for souls. In the game, they are collecting those souls.
My Infernals need some catastrophic, alien yet magical looking terrain. They’re fighting in all parts of the continent, but I’m thinking this is a terrific time to start working on some more arid scenery for a table set that I have been planning for some time.
Step 1 – Conceptualizing the design
Conceptualizing the design starts with the premise. Alien, yet magical looking terrain for an arid region. From there, the concept gets more well defined. In the game, I want a line of sight blocking terrain element with multiple levels. The game rules don’t currently allow for climbing, so I’m not worried about multiple surfaces for playability. Line of sight blocking means the piece should be solid, and between two to 5 inches tall.
Next, I survey all the junk I have lying about. I have a lot of 1-inch insulation foam. Some made into bricks, others in chunky fragments of failed projects. I also have this candle making cup, from another project that moved in a different direction from originally planned.
The candle maker cups got me thinking about lighting effects, and I remembered that I have a bunch of those lighting cups from my glowing pool project. I covered one of the lights with the cup and was pleased with myself for a moment, thinking I could have some sort of glowing tower.
Then I remembered that I have acrylic scrap from the Glowforge when I made some ghostly game tokens (for representing souls). A few minutes with an old set of pliers and a video battle report playing to keep me company, and I found myself ready to start crafting.


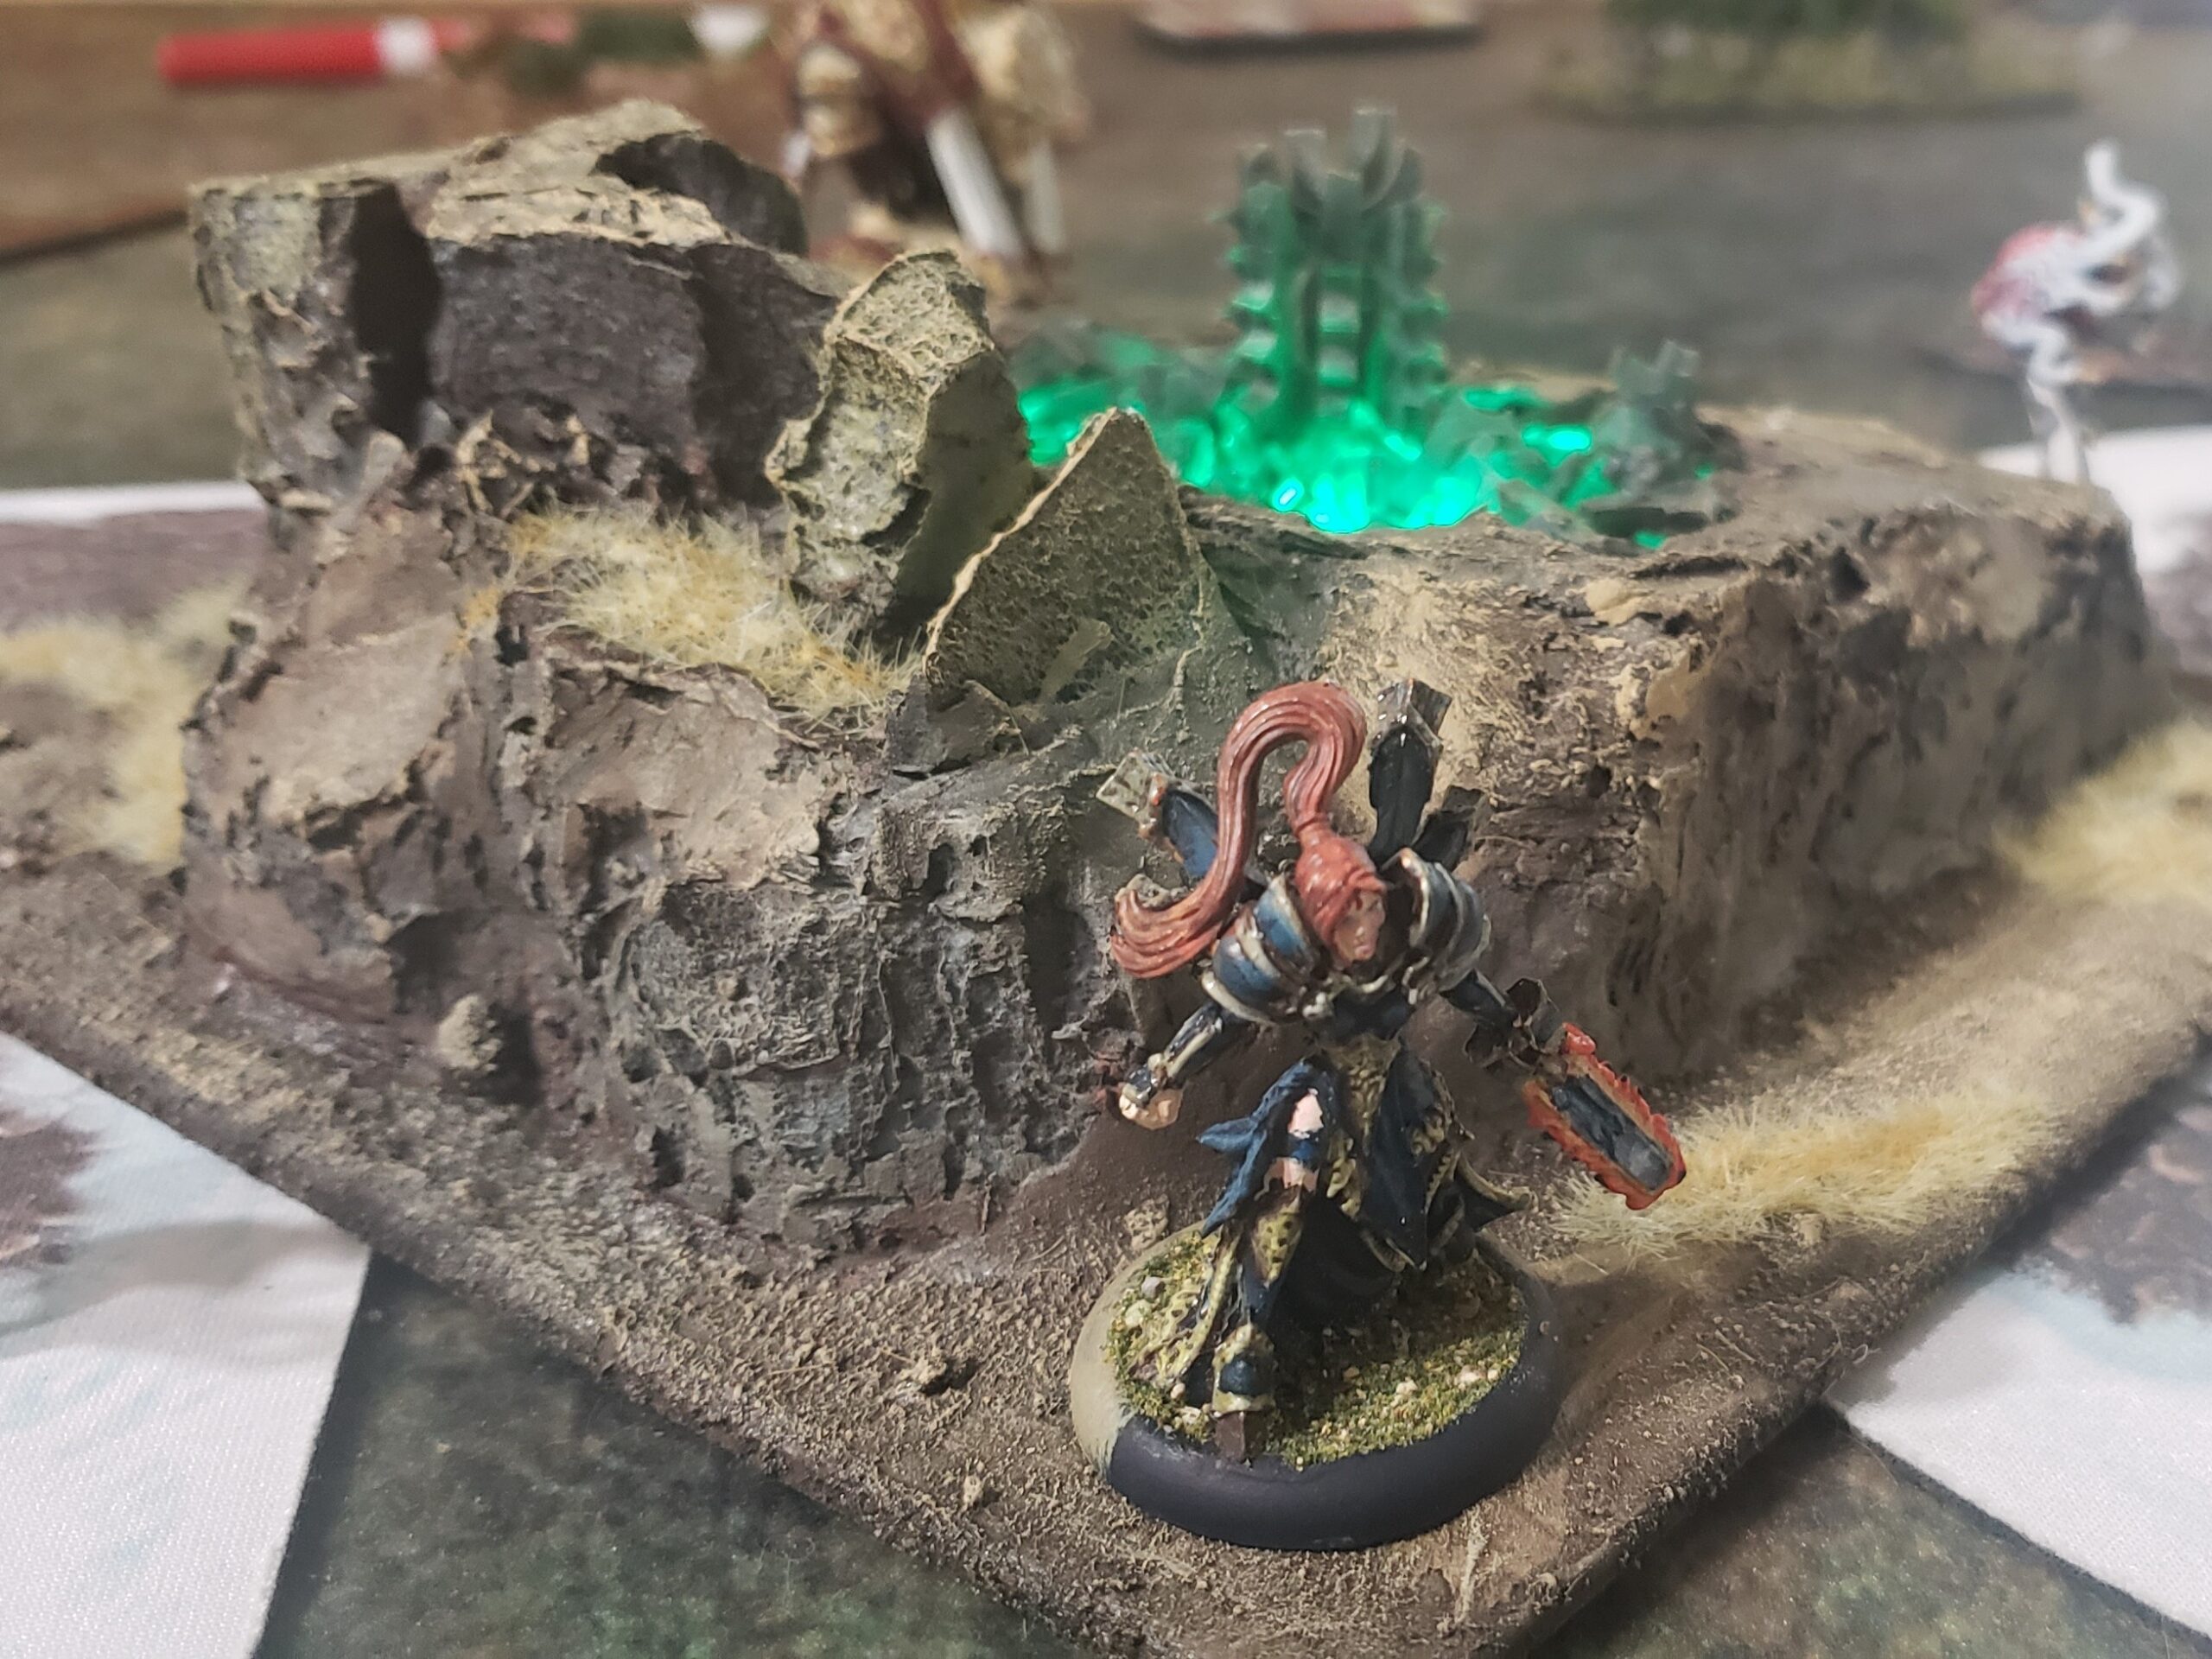
The design would be simple. A pit of crystalline rock, made from acrylic scrap. Surrounded by rocky outcroppings, in the desert, made from foam. Based on a piece of MDF.
Step 2 – make the crystalline rocks
I wasn’t sure this would work. I proceeded anyway, cutting up acrylic with my trusty pliers. I used a box to keep everything from wandering and not flying all over the hobby room. As I cut, I discovered some rather unnatural looking spikey bits. They glued together nicely, forming some sort of pillar. I continued cutting, and after cutting a bunch, I tested the light under the acrylic to see what kind of effect it would have.


Step 3 – Rocking the foam
The clear plastic used as blister packs for models makes for a great seal to catch the acrylic fragments. Trace the light disk on both the plastic and in the foam. Cut the plastic with scissors, and the foam with a trusty sharp knife. Then, to make the exposed side seem more natural, punch through the final quarter inch or so with a flatblade screwdriver. It makes a larger exit hole, because it’s so blunt.


Again, the foam I’m using here is from a project gone wrong. What looks like one piece is actually two layers glued together, and a little bit of a gradient built in. The blue groove is where a river was supposed to go.
Step 4 – test fit again
Just to make sure this works, I test fit with the light, clear plastic sheet and acrylic. Looks good.


Step 5 – Spackle, and gluing in the acrylic!
I like the pink stuff that turns white when it’s dry. The feel for this is that it was a spring that fills the pool and overflows off that slide, but the whole thing has been corrupted by some weird crystalline thing. Hot glue seems to work best for me. I tried superglue, but it wasn’t working well.


Step 6 – Priming and more spackle.
I know spray primer will eat away at the foam a little. I’m okay with that in some applications. The pitting in the foam actually looks realistic. The gap that forms in a couple of glued together pieces isn’t so great. A touch of spackle cleans that right up.


Step 7 – Staining & first drybrush
All these “steps” seem pretty similar, but there’s drying time between each step. Here, the whole piece is stained with a dark brown wash, then drybrushed with several desert flavored colors. There’s a bit of brown, yellow, some blue, all blended up, and Vallejo Iraqi Sand as a highlight.


Step 8 – Ground effects
Some mix of dirt, from my own mix of Woodland Scenics ground cover, held fast with tacky glue. After the dirt dried, I dripped some brown wash on the dirt, and again, waited for drying. After drying, I sprayed the whole thing with some matt varnish.

Step 9 – Static Grass
Static grass and drybrushing was next. The static grass here is a dry grass mix, applied with the Woodland Scenics applicator with the AC adapter.


Step 10 – Coloring grass & another layer
After taking a stroll through the desert, I realized that the grass out of the bag wasn’t going to be enough color for my Infernal pit. It needed a little more color. After thatching with a fine comb, I dabbed some ochre brown in patches. I added another layer of static grass, again in patches, to give the scene some unevenness.


Final thoughts and glam shots
This project was another learning project. It was my second time trying the static grass applicator. Everyone who says step up and buy the AC adapter is correct. I tried both the 9v battery and the adapter, and the adapter easily wins. The crushed acrylic was a bit of a gamble, and I think it looks okay. Maybe I should have taken a hammer to a bag of the acrylic for some severe shards, but there’s an argument for the more rigid structure.
There is a bit of fragility in the rocky structure above the dried spring, so I probably won’t be taking this model to my local game store. It will be for home play, like the acid pits. It also has the downside of being constructed on a base, which can interfere with a game. In the future, I will try to make a whole table, with matching unbased scatter terrain for display and gaming in mind.
Overall, this was a fun project, and I learned a lot in terms of technique. I’m glad to have salvaged and upcycled again. Natural features are fun because they can spring straight from the imagination, and they can push the boundaries of reality. The alien structure is a neat juxtaposition. I think when I do my table, something like this will have to find its way into the collection of scatter terrain.


