Ranged Awesomeness
Cygnar’s guns
Most players consider Cygnar guns to out shoot Trollblood guns any day of the week. In the case of Caine’s Hellslingers, his army threatens 18 to 20 inches up the board, and rocks a 3 point RAT and damage swing on the battlegroup. Caine loves the super-efficient Chargers, and his Hunters kicking up to POW 9 armor piercing shots simply wreck things. The gun mages round out the army and add utility with Thunderbolt shots. Captain Adepts help already accurate Cygnar shooters into any form of DEF skew, and Bastian Falk kicks gun mage shots into the POW 12 range.
Caine’s Hellslingers & Sons of the Tempest
- Caine’s Hellslingers (+20)
- Squire (0)
- Hunter (10)
- Hunter (10)
- Ace (10)
- Charger (9)
- Charger (9)
- Charger (9)
- Charger (9)
- Charger (9)
- Gun Mage Captain Adept (5)
- Gun Mage Captain Adept (0)
- Lieutenant Bastian Falk (0)
- Arcane Tempest Gun Mages (11)
- Arcane Tempest Gun Mage Officer (4)
Trollblood’s guns
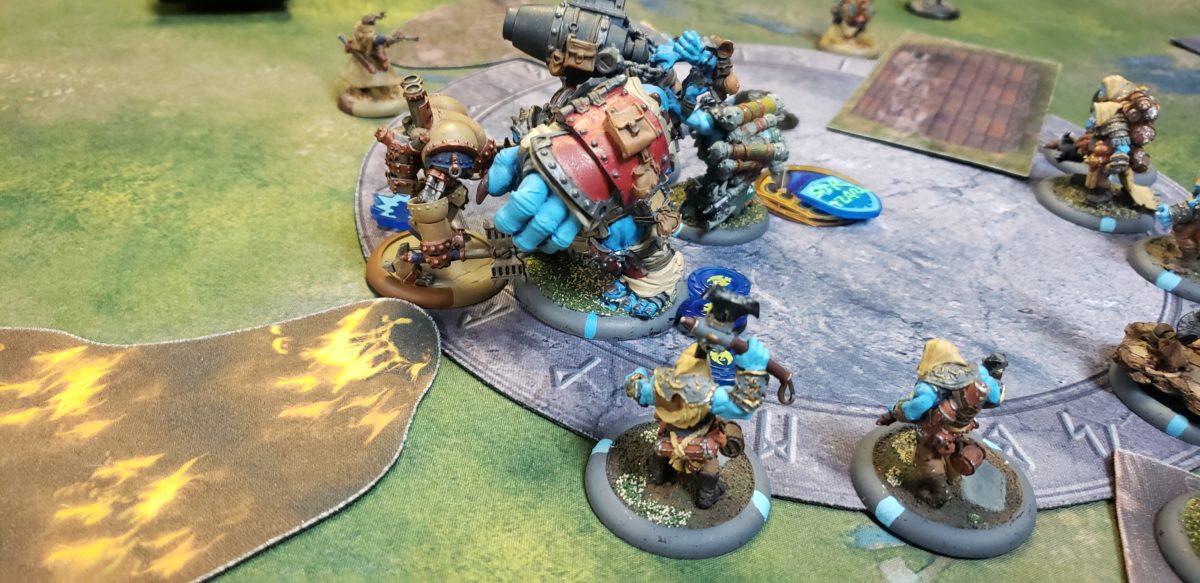
The Trollbloods, generally seen as short ranged fighters, prove capable of catching opposing forces by surprise. Trollkin guns generally only hit 8 inches. Pyg guns, however, reach 14 inches. With Gunnbjorn, Pyg Bushwhackers push their threat to 24 inches. Their RAT 4 stat line seems bad, until they stack up their combined attacks and roll out five RAT 8 POW 12 attacks. Accuracy really isn’t problematic for the Bushwhackers. On turn one, due to advanced deployment, they can shoot and kill on the first turn, provided they start second. Gunnbjorn pushes them deep, enabling the pygs to shoot to the enemy’s 11″ mark.
While the Bushwhackers play a key early game element, the War Wagon, Dozer & Smigg, and the Mountain King work the middle game. The king and wagon, provided they survive the first two turns, provide much of the damage and attrition element in turns three and four. Hopefully, the game ends in a win by then.
Captain Gunnbjorn’s Kriel Company
- Captain Gunnbjorn (+28)
- Trollkin Runebearer (0)
- Mountain King (36)
- Dozer & Smigg (17)
- War Wagon (16)
- Braylen Wanderheart, Trollkin Outlaw (0)
- Krielstone Bearer & Stone Scribes (9)
- Stone Scribe Elder (3)
- Trollkin Sorcerer (3)
- Pyg Bushwhackers (13)
- Pyg Bushwhacker Officer & Mortar (5)
- Pummeler Crew (0)
Gameplay
Initiative and Deployment
Trollbloods won initiative, and chose to go second. Normally, the ranged army would desire a first turn, but the Bushwhackers desired a first turn volley. Additionally, the terrain favored taking the side with the trench rather than rubble. The Hellslingers could hide in rubble, but at the cost of movement.
Turn 1
Cygnar ran, poising for a first strike on the second turn.
Trollbloods took more measured steps. The Bushwhackers advanced past their woods, and took two skilled attacks on the nearest light warjack, a Charger. The Mountain King, Dozer, Krielstone and Pummeler also advanced. The Pummeler crew fired off a random shot at the Cygnar line, doing little damage. Gunnbjorn aided the War Wagon with extended range through Snipe, and created a stone wall in front of Braylen, shielding her from enemy bullets. The wagon moved forward, and used its extended range to launch a shot at the wounded Charger, cratering it.

A mistake made?
Caine’s Hellslingers possess a strong alpha. If allowed to make the strike, the battlegroup delivers an unusually high amount of damage. Gunnbjorn failed to protect his army with his feat, Fortification.
Turn 2
Caine activated his feat, and opened with some shots on the Bushwhackers to build synergy. With his warjacks running at optimum strength, Caine ordered them to fire at the Mountain King. Multiple shots rang out, and within minutes, the king was dead. Long live the Troll Whelps left behind. Ace positioned near Caine, activating Infiltrate to hide himself and his master.
With Gunnbjorn’s biggest ally destroyed, he had little choice but to attempt an assassination. The Krielstone powered up as much as it could, and moved far enough into the zone to catch Caine, who was just touching the edge, in its aura if maximized. The stone elder warped the stone’s aura to eliminate stealth. Gunnbjorn advanced, loaded the stone to maximum fury and took the first shot at Ace, boosting the attack. With one shot from his massive bazooka, Ace, the Charger and Caine were thrown clear of the zone, and clear of the Krielstone’s aura. The assassination attempt failed, since all attacks would automatically miss the stealthy warcaster.

Gunnbjorn’s army could only try to remove as many warjacks as possible, and control work on scenario. Braylen advanced, killing defending gun mages and making a full advance to stand on the flag. The war wagon pushed in, continuing the volley and clearing the zone.
The Bushwhackers threw shots into warjacks, smacking them hard, but failing to eliminate any. They reformed in the rectangle zone, hoping to jam out any warjacks capable of scoring.

Trollbloods score two.
Turn 3
Caine falls back, fearful of the troll guns. A warjack charges Braylen, but misses, and the gun mages fail to remove her, due to a lack of guns. Gunnbjorn’s feat, although late, kept Cygnar from rallying. They managed to remove some of the Bushwhackers, who wandered out of Gunnbjorn’s control range. Cygnar scored 1, and Trollbloods 0, giving a total of Cygnar 1 to Trollbloods 2.
The wagon backed out of the zone, to open fire on the warjack near Caine, and to prepare an assault on the right rectangle zone. Braylen killed some gun mages, and Gunnbjorn put the hurt on a warjack, then created a wall to defend Braylen. Dozer ambled up, and finished off a wounded warjack. A whelp ran into Cygnar’s rectangle, and the score remained Cygnar 1 to Trollbloods 2.

Turn 4
The charger steps over the wall and smacks Braylen. Hellsingers finish off the Bushwhackers. Things don’t look good for the trolls. Cygnar picks up two more points, making the score Cygnar 3 to Trollbloods 2.

Gunbjorn drops Snipe and the wall. The wagon charges the Charger, crushing it. It flies backwards, and the wagon drops a devastating shot on it, cratering it. It positions itself in the zone, not claiming it, but contesting, due to the remaining hunter. Dozer and Smigg pick up the Charger in the circle, throwing it out of the zone. The trolls fire shots at available targets. The score moves to Cygnar 4, Trollbloods 3.

Turn 5
Caine’s Hellsingers kill the wagon, and do some damage to the objective. The hunter finishes off the objective. The injured, previously thrown Charger walks into the zone. Caine pursues the only plan he can, with attrition having finished off most of his army. He takes as many points as possible. Score rises to Cygnar 7, Trollbloods 3.
The Trollbloods can pick up the circle and flag, and maybe the objective. Dozer and Smigg fire a shot on the objective, doing massive damage. One more shot should remove it. They can take an additional shot only if they kill the Charger. They swing, and miss a boosted attack. They swing two more times, missing each swing as the Charger deftly avoids Dozer’s huge hands.

Gunnbjorn’s troops really don’t have a way of finishing off the objective or scoring the zone. The Charger really saved the day. Cygnar picks up two more points, and wins 9:3.
Afterthoughts
Bushwhackers
The Bushwhackers bring an interesting element to Kriel Company. They add either many low accurate, low POW shots, or create a couple high POW, highly accurate shots. I love being able to reroll attacks. I didn’t have a chance to effectively use the Bushwhackers’ Slip Away order, although I could have pushed deeper into melee combat with the Chargers. It wouldn’t have prevented a shot if the Charger was willing to step backwards and take a hit (from an effectively MAT 6 vs def 13), but at least it would pose a question for my opponent to answer. I plan on using them again.
Mountain King
Wow! I really messed up on my first turn by not protecting the King with Gunnbjorn’s feat. I never even had a chance to crank out some high POW offensive. His whelps were super useful in Kriel Company, however, as they provided Marked Target for more than one turn.
Dozer and Smigg
Always a pleasure to blow out a unit with boosted blast damage. I played this game prior to the December 2019 update, so even though my blast damage was only POW 7, it was fine because Gun Mages are weak little guys.
Braylen
I have played her several times, but never as effectively as today. She is more than a buff bot to the Highwaymen. Without their presence, I was able to employ her more aggressively. I didn’t fully realize how powerful her guns could be, with Luck on missed attack rolls. Also, Run & Gun is amazing. Walk a full distance, smack down an easy target, and pull back to a flag. I can see this being really easy to work with other warlocks, someone capable of providing her with a back arc to shoot.
War Wagon
One of my favorite battle engines, the War Wagon pushes hard into the enemy, and absolutely shreds dudes. It might not be as necessary in Kriel Company anymore, due to the newfound accuracy provided by solos. Still, a battle engine with potentially RAT 9 seems really good.
Pummeler Crew
I needed to position the Pummeler nearer to the objective. If it had Eyeless Sight, it could have fired at a few things. Instead, it was blocked by a cloud from the burning terrain piece.
Gunnbjorn
I really messed up Gunnbjorn’s feat. Fighting into Caine should have been weighted a bit more toward Gunnbjorn. The feat should have given my troops a turn of shooting, focusing on Caine’s warjacks to reduce the impact of his feat.
Critical Devastation on the bazooka means Gunnbjorn cannot attack if a throw would move the target out of range of subsequent attacks. It’s a hard lesson to learn, but sometimes not firing is smarter than taking a shot.
Caine’s Hellsingers
My opponent played his force effectively, smartly taking advantage of the lack of protection for the Mountain King. I still feel Caine is better with Trenchers. A smoke cloud, and assault charges, or Commandos with Anatomical Precision seem more effective to me than straight up ranged shots. I feel like the Arcane Tempest Gun Mages want a warjack to take advantage of the Rune Shot capability on the officer. Caine doesn’t seem to support throwing warjack points on a marshal, but Calamity makes it a possibility. Imagine a Cyclone, starting at POW 12, and swinging up to POW 18. Sure, it’s unboosted, but really good.
A long time ago, someone told me that building for the feat is usually a trap. In this case, I agree. I played the Hellsingers when they first appeared, and the game didn’t go well because I didn’t bring a way to do damage in melee. My concept was to run Grenadiers, and pull reloads from trencher models. It was fine, until I faced invincible shield guards. My lesson was to bring capable melee models for a combined arms force, and use Calamity to boost their damage output.
Summary
I look forward to playing Kriel Company with the new changes. I like the idea of more accurate shots from Dozer and Smigg. The Scattergunners could make a return under a different warlock, maybe Kolgrima. I will play Gunnbjorn again. He’s fun with the wagon, and I want to see a performance from the Mountain King.