
I’ve made the claim that I’m a casual player. List-building with a casual approach means sometimes you stumble on gold, and sometimes you land in the mud. I won’t claim six impalers is tournament winning, but it can be fun.
Trollbloods: Power of Dhunia
- Captain Gunnbjorn +28
- Dozer & Smigg (16)
- Troll Impaler (9)
- Troll Impaler (9)
- Troll Impaler (9)
- Troll Impaler (9)
- Troll Impaler (9)
- Troll Impaler (9)
- Slag Troll (9)
- Dire Troll Mauler (13)
- Troll Whelps (free)
- Troll Whelps (free)
- Krielstone Bearer & Stone Scribes, max (7)
- Stone Scribe Elder (3)
- Dhunian Knot (free)
Why do I own so many impalers? I guess I picked them up over time. Two battlebox purchases, and a bunch in a big lot that I bought a long time ago. Every once in a while, I toss a version of this list out to see how it plays. Why? Gunnbjorn hand out boosted ranged attack rolls for as long as I can remember, and fishing for crits to slam things around brings me joy.
Recent changes have allowed me to include both Dozer & Smigg and the Mauler. In the past, I think I was only allowed one or the other. In this version, I could drop the Slag, maybe drop to five impalers, and throw in a second Mauler for a second Impaler shooting at POW 17. Thing is, do I need two impalers throwing around POW 17 spears?
Some other recent changes had me curious about how all this would work. Gaining assault and follow-up makes the impaler capable of a ranged attack on the charge. Gunnbjorn can make these assault shots boosted, making critical hits more likely. Following up after a slam means the impalers can get deeper into the front line. Gunnbjorn’s field marshal ability, adding killshot and gunfighter means the impaler can pick up an additional ranged attack. If charging into infantry, an impaler should get a ranged attack, melee attack, and another ranged attack at a minimum, if everything hits.
That’s honestly a bit of a gamble. First, things have to be within 10 inches of the impalers to pick up the charge. Secondly, there’s the question of whether things will die when they’re asked. If the right support is added, we could easily get to 12 inches on the charge, or maybe even 14 inches, with either Boomhowler the Destroyer or Lanyssa Ryssyl.
Essentially, this is an exercise in triggering slams and killshots. The plan is to advance, throw spears, then charge when the enemy gets in range. Dhunian archons with puppet master will help at least three of the impalers land critical hits.
Cryx: Scourge of the Broken Coast
- Skarre, Queen of the Broken Coast +26
- Doctor Stygius (free)
- Sepulcher (32)
- Defiler (7)
- Axiara Wraithblade (free)
- Satyxis Raider Captain (3)
- Warwitch Siren (3)
- Warwitch Siren (3)
- Misery Cage (2)
- Swamp Gobber River Raider (1)
- Satyxis Raiders (14)
- Satyxis Raider Sea Witch (3)
- Black Ogrun Ironmongers (5)
- Asphyxious the Sanctified (14)
- Mangler (14)
- Scharde Dirge Seers (free)
I may have missed something here, or swapped some models, but I believe this is fairly accurate.
Skarre’s feat will make things difficult for my side for at least one turn. Usually, I see her feat used to protect high defense things by making them even higher defense, and impossible to hit. Future Sight with warjacks makes her jacks a little more efficient. Death Ward on the Sepulcher helps it survive, but some of her other spells aren’t going to be really effective. Admonition can be helpful to keep herself alive late game, or to keep her arcnode mobile. Backlash is a null spell against most Trollblood lists. Black Spot can’t target warbeasts, and my list features few warrior models. Blood Rain could help eat away the Krielstone, so the arcnode needs to die early in the game. Skarre’s POW 12 spells won’t be super effective against Impalers under the Krielstone at ARM 19.
Asphyxious helps fix the low POW from the raiders and Skarre’s spells. Malign Alignment (dark shroud on his unit and warjacks) can nullify the Krielstone. Getting a free focus to spend on the charge could really help the Mangler.
The raiders are obvious food for the Sepulcher. However, I don’t see another interaction here with corpses. At the very least, they give the Gang Fighter bonus, giving a charging colossal an effective MAT 8 and POW 21. Throw in a servitor for dark shroud, and the thing deals out a monstrous POW 23. In my opinion, the Kraken is a better fit for this army, seeing as how there are no Mechanithralls in the list for the Sepulcher to interact with. The extra power and focus from the corpses on the Kraken would allow it to feed on the living troll models (warriors and warbeasts alike), hitting with POW 26 on the Harvesters.
The Black Ogrun Ironmongers heal really well. However, their Curse ability on the leader plays out a little oddly. It requires the leader to be within 7 inches of the chosen model/unit. I suppose that’s fine on a retaliatory turn, but not so good for a charge or a ranged shot at maximum distance.
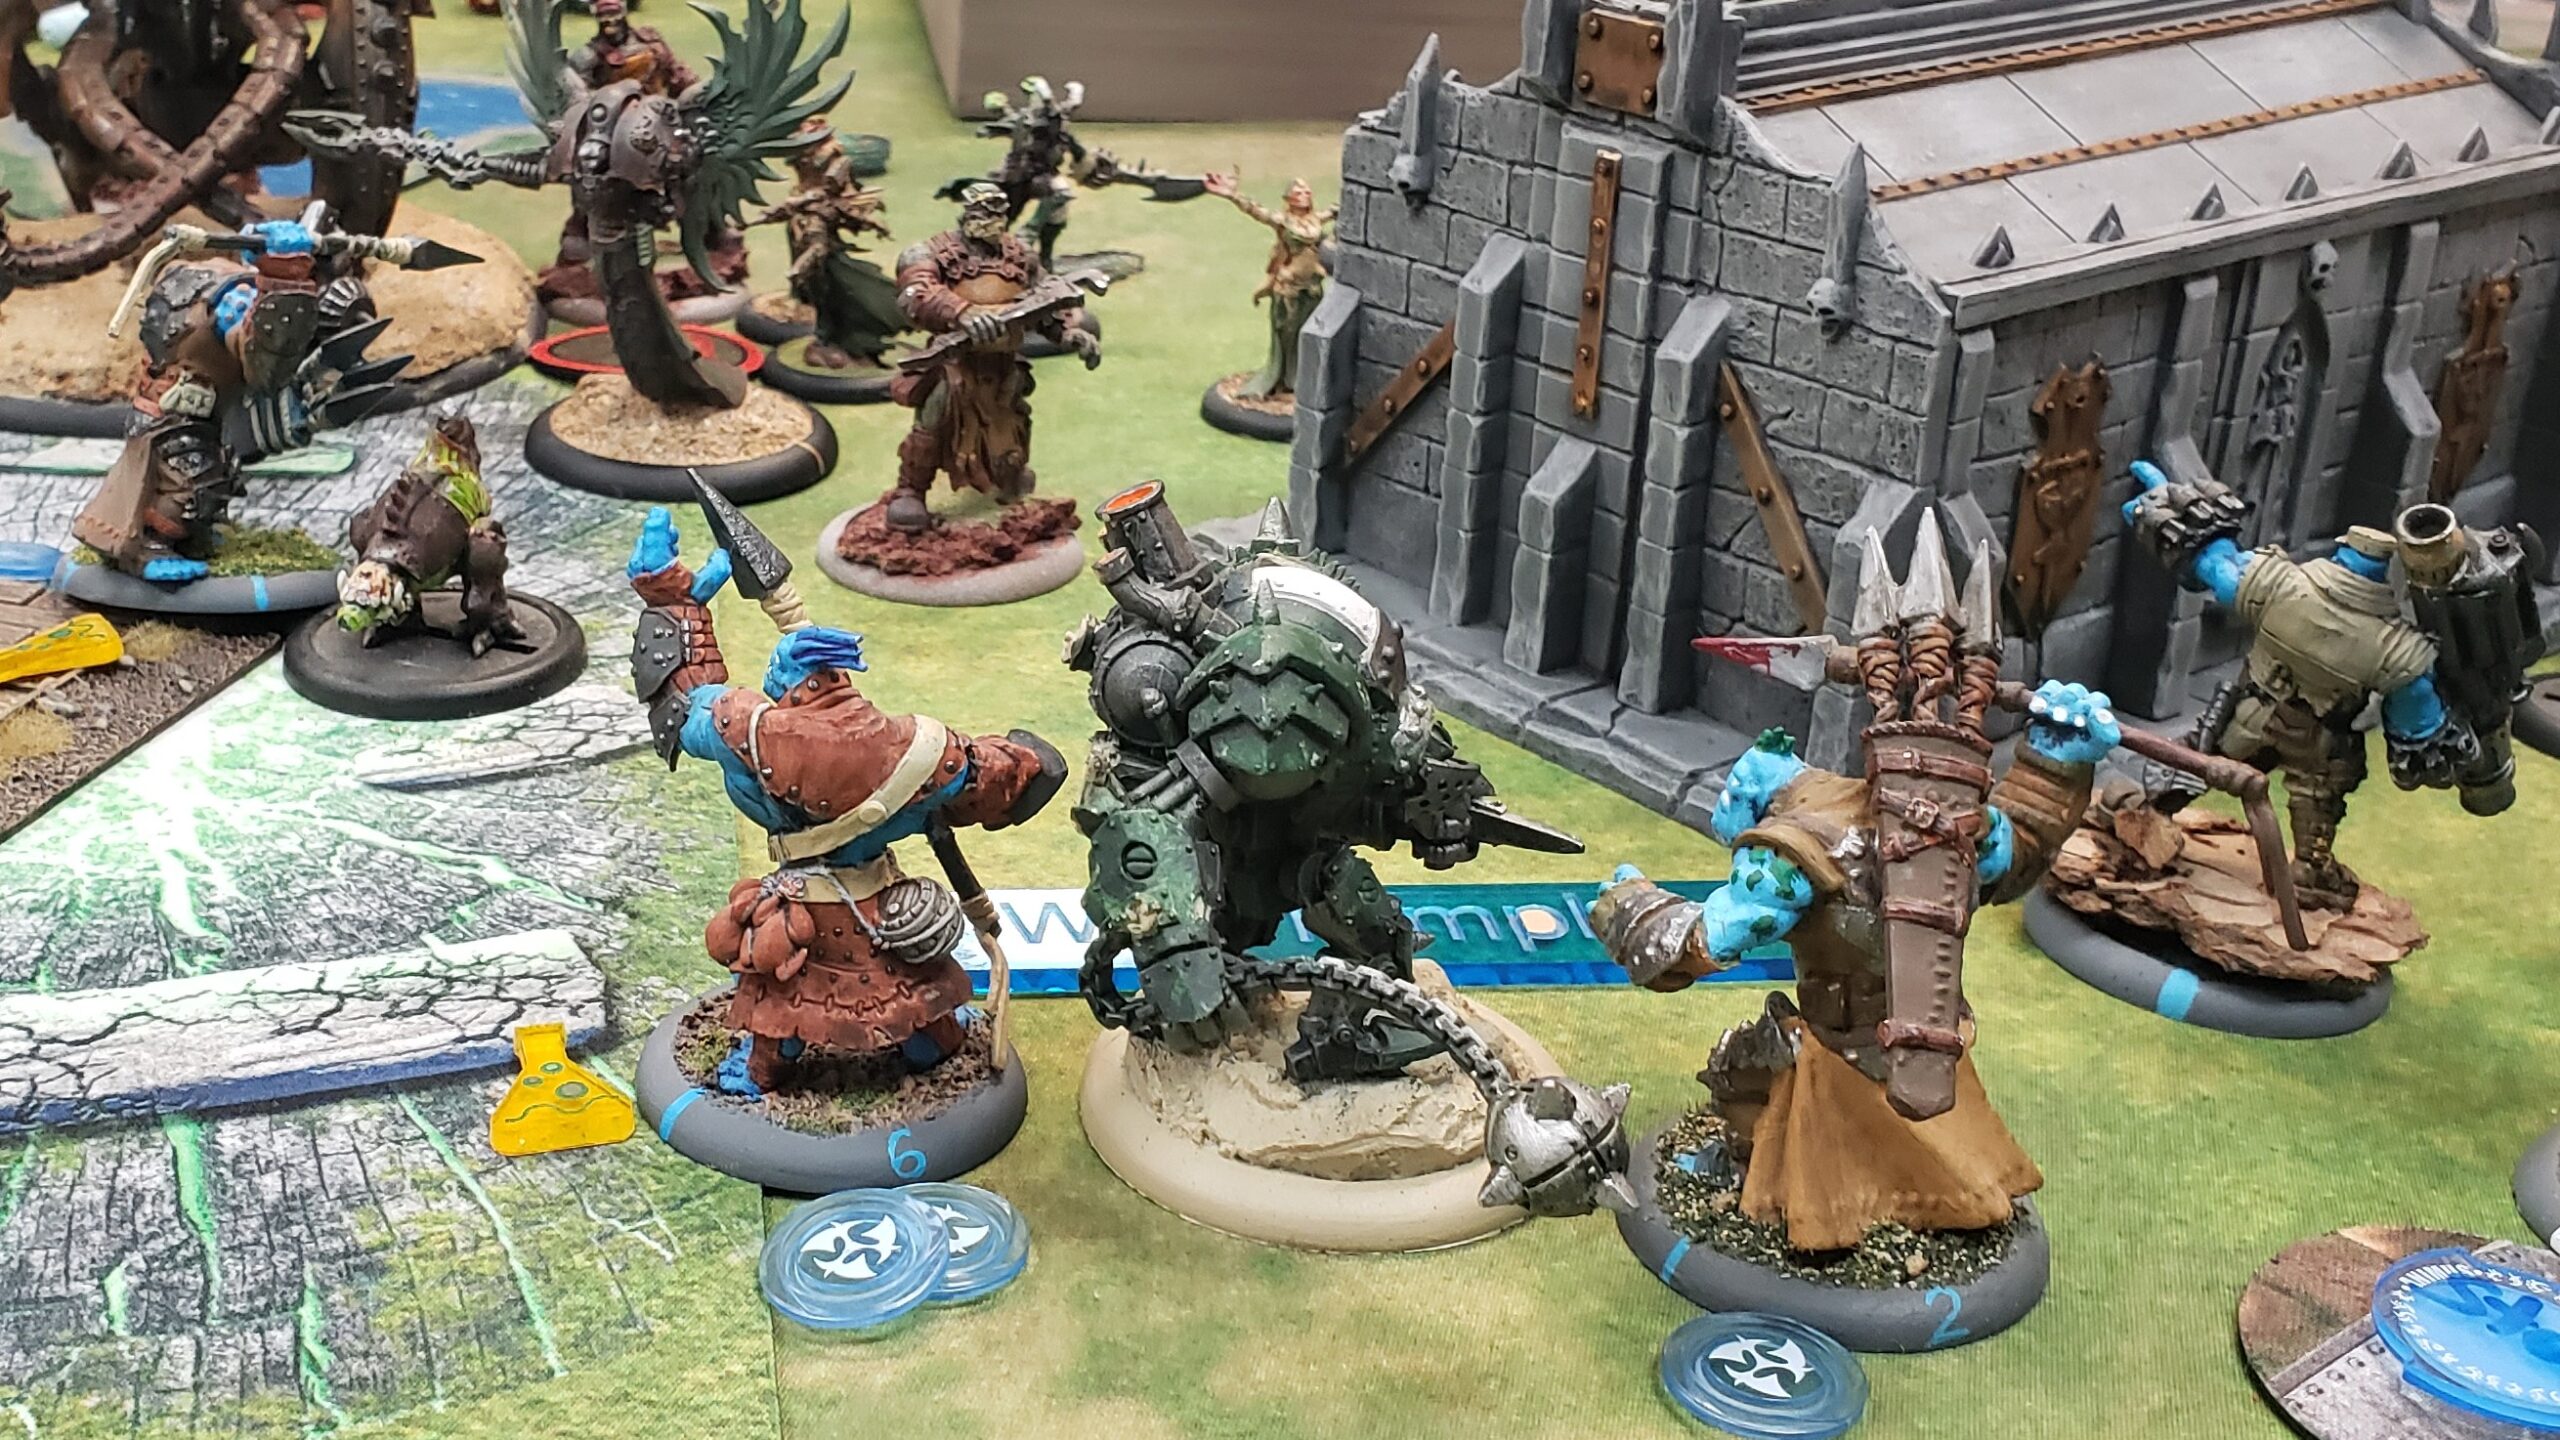
The Game
Turn 1-ish
Trolls win initiative and choose to go first. The wall is a trap, obviously, sitting right around the 12-inch line. Fortunately, the trolls want to be beyond this line, right up in the face of any warjack or unit willing to stand before them.

The left side was my strong side, and so I questioned why the Sepulcher was placed there. My opponent decided that his right side was more favorable, because the forests allowed me to shoot and charge his Sepulcher with impunity. The way line of sight works with forests is that medium base models can see the large base model, but not visa-versa.
Gunnbjorn keeps Snipe on Dozer & Smigg, and Explosivo on an Impaler.
The Cryx army plays cautiously. The Sepulcher takes Death Ward, and Skarre keeps Admonition on herself. I think I would have placed this on the Defiler, but I think my opponent’s been burned by one too many surprises with models getting too close to his warcaster for comfort. Asphyxious didn’t make it to the building, so Gunnbjorn feels comfortable parking there and burning fury. The raiders pull into the zone, and try to spread around as best as possible, fearing blast damage from Dozer & Smigg.
Turn 2
Gunnbjorn hugs the church wall, and uses two fury for his upkeep spells. Explosivo should probably drop, since there aren’t enough targets in close proximity to make it worthwhile, and because it only costs one point to cast. Guided Fire happens, and he boosts a damage roll on the Sepulcher.
Dozer & Smigg remove several raiders in a blast, using Lucky Shot for free, and making boosted high-explosive rolls. Even with blast resistance, the raiders are only ARM 16. The POW 10s only need to roll a 7 on three dice, something Oddsmachine says has a 90% chance of happening. At the end, there is something like eight fury on the board.

Cryx piles in, trying to prevent the score from going crazy. The Mangler deletes the Slag troll, and some shots from the Sepulcher leaves my Impaler next to the Sepulcher alive. The little arcnode will prevent the Impaler from getting a good line in for a charge, but Skarre feats to be doubly sure, and prevents charging the Sepulcher, the Mangler, the Defiler, herself, and Asphyxious. Cryx ends the turn scoring their flag, and using a servitor to contest the troll flag.

If this game had been on a clock, this turn would have been a major loss for Cryx. A lot of time was devoted to deciding whether the Sepulcher could get in on Gunnbjorn. We decided it couldn’t, based on the positioning of my models, and the path Gunnbjorn would need to be pulled if the sepulcher were to hit him. If the Sepulcher were to move close enough to draw Gunnbjorn out, the chance to hit is 74% with a boosted MAT 6 vs DEF 15. At DEF 17, due to the obstruction, it drops to 50%. This could be mitigated, however, if one of the servitors could get next to Gunnbjorn. That’s totally possible, but the plan was missed by both of us. Charging, then hitting Gunnbjorn with a boosted attack, then buying an unboosted attack has an 81% chance at success.
Again, positioning is key in this game. The church saved Gunnbjorn.
Turn 3: Trollbloods 0, Cryx 1
Gunnbjorn drops his upkeeps and plants a wall to block off other attacks. He feats. Since his army can’t charge the Sepulcher, he directs an impaler to strike at Dr. Stygius, removing the capability of Cryx to score the flag that turn. The three impalers on the right clear the zone, and the krielstone teams up with whelps to prevent Asphyxious from having a landing zone next to the church. The Mangler gets knocked down by a spear, but still lives, and the Mauler hangs about on the edge of the zone, keeping a watchful eye on the Sepulcher. Trolls pick up two points, and Cryx earns none.

Cryx contemplates the assassination run again, this time being prohibited by the wall template and the models around the church.
Ultimately, the pirates decide on contesting their left zone, where the three impalers hang about, and trying to clear their right zone, with the Sepulcher. The mangler tried to dispatch an impaler, but failed. The impaler right in front of the Sepulcher took hits from the Defiler, witches, Skarre, and finally Asphyxious. It hovered on a single box for a while, until giving up the ghost right before the sepulcher activated. The sepulcher advanced, pulling in the mauler before killing the other impaler. It failed to clear the zone, thanks to the impaler in the middle. Cryx gains a point, as do the trolls.

Turn 4: Trollbloods 3, Cryx 2
Unfortunately, this is where the game ended.
We discussed things, and we both agree that the Mauler could kill the Sepulcher. The mauler was totally functional. It could use one fury to cast rage on itself, then swing six times. Assuming the colossal had around 40 boxes, the Mauler stands a 70% chance at one rounding it. The Mangler would prove more of an issue, but I could see the krielstone clearing a path for the warbeast, allowing it to charge. It pounds the mangler to dust, then shoots the sepulcher, if it’s still alive after the mauler’s beating, or Asphyxious. Then the impaler gets to chuck a spear. The three impalers on the right finish clearing out the zone, and gunnbjorn would hang onto some fury, but either shoot the Sepulcher, Asphyxious, or Defiler, depending on which is alive. Worst case, the whelp would contest the flag. Trolls should score two, and Cryx none. Possibly even scoring three to none.
Probable score: Trollbloods 5, Cryx 2. Possible score: Trollbloods 6, Cryx 2.
The Cryx turn would be dependent on what remained alive. I don’t believe an assassination would be possible, with the wall, models in the way, and the church. I think they could have scored one more, and maybe contested, but things are in danger.
Possible turn 5: Trollbloods 6, Cryx 3. Or Trollbloods 7, Cryx 3.
In the first assumption, trolls need to score two points to cryx’s zero, or one point.
If it’s the first assumption, between the Mauler and Dozer & Smigg, the left side should clean up nicely. The impalers on the right should clear that zone, and maybe even get a line on the cryx objective. If so, two points is easily earned, and possibly three. Trolls should win.
A troll win depends largely on destroying the Sepulcher. After that, Asphyxious is the next threat, because of Dark Shroud. Cryx should be way up on time, using the raiders only to screen for the Sepulcher and to provide gang. They probably could remove two impalers per turn on one side of the board, and still keep the mauler from landing near the sepulcher.
Analysis:
Is it worth wasting time considering an assassination?
I’m convinced that assassination is usually a trap. On the games where I ignore assassination as a win condition, I don’t clock myself. I also tend to score more points, as I’m more concerned with that spread. Other people have various opinions. I ask how often we waste time on assassination runs and clock ourselves. A quick non-scientific poll on FB has people saying:
More experience means you’ll be less likely to waste time on unsuccessful assassination attempts. You’ll become quicker at calculating the plays, and better at determining if it a run has a good chance of success.
EK
Way too often, and it’s easy to circumvent the trap. Understanding the statistics and knowing how the math stacks up makes it easy to check how likely a run will be successful. If more than one or two things look difficult to execute in order to make the assassination possible, skip it.
LS
“I was very assassination oriented when I started (~2007). I would often just get tunnel vision on that goal and get gutted on scenario. When deathclock became the norm, I took a long stance to refine my play and up my scenario game. One thing we did locally, and I do often still is play my casual games at 42 minutes (hardcore time). That being said, I will often go for an assassination run if it’s a decent shot.”
DP
Took a long time to learn to attrition until their warcaster/warlock had to over-commit, then assassinate.
TG
“I rarely go for caster kill and rarely clock out, and I play long turn 7 games a lot.
Prefer the scenario play.
I have won many games from people clocking and maybe not going for a caster kill where it would be their only chance.”
JJH
“Not that many in my personal experience. Usually assassination runs are taken if it’s a good opportunity or there is nothing better to do.
But scenario and attrition need to be the primary focus or you end up losing on those conditions first.
I have backed out of assassinations mid-run because the new board state dictated scenario as the priority to win.”
AS
And my opponent had words to add as well:
“My bane has been the tempation to kill things that don’t absolutely need killing instead of putting a laser focus on only the things that do.”
JMacK
If you’ve got opinions, you can add them below.
Where to take Gunnbjorn 1 with Impalers?
This list has some shortcomings. For one thing, Gunnbjorn is wanting fury. The Runebearer can help. I could remove the Slag Troll and add in the Trollkin Runebearer.
Next, I want to increase the threat on charging Impalers. I can do so by adding the Troll Axer, Lanyssa Ryssyl, or Boomhowler the Destroyer. Lanyssa Ryssyl is the cheaper option, coming in at three points. She requires no adjustment to the list. Gunnbjorn can help her stay alive with his wall. Additionally, I can add a Northkin Shaman and give her a cloud to hang in, to trigger Prowl. With three points remaining, Janissa can be added for her hill, providing a knockdown spell, or a hill, and sometimes some crazy pushing.
The alternative, Boomhowler, costs eight points, leaving room for another whelp. The axer offers pathfinder, which in this game would have made my impalers more aggressive on the right zone.
Where is the gold?
Killshot and gunfighter, combined with the Guided Fire spell and possibly Snipe. This could land a crazy single shot with a Bomber or Impaler, or Dozer & Smigg.
As fun as this can be, I feel the more competitive option is to look for warbeasts with sprays. I like the road hog, because it has the assault spray, then kill shot, spray, and an advance at the end of its activation. With boomhowler 3, this beast could charge 10 inches, kill something, moving 7 inches, then move an additional 5 after everything else moves. Of course, this has the potential of getting way out of hand, moving the beast way out of Gunnbjorn’s control range. I have a fun list with a single road hog (because that’s all I own).
- Captain Gunnbjorn +28
- Dozer & Smigg (16)
- Road Hog (15)
- Troll Impaler (9)
- Slag Troll (9)
- Dhunian Archon (6)
- Dhunian Archon (6)
- Princess Delores Graciela (6)
- Dez & Gubbin, Dynamite Duo (free)
- General Thunderstone Brug (free)
- Swamp Gobber River Raider (1)
- Dhunian Knot (free)
- Krielstone Bearer & Stone Scribes (max) (7)
- Stone Scribe Elder (3)
- Pyg Bushwhackers (max) (12)
- Officer & Mortar (4)
- Pyg Lookouts (max) (9)
Archons keep things alive, and heal up beasts as well as help with fury management. The Princess or Dez & Gubbin are fun, especially with Snipe. Brug helps his friends, and Bushwhackers kick butt on the first or second turn. Lookouts help pygs with accuracy, and harass from the sidelines.
Thanks for reading
As always, thanks for reading and good luck. If you have comments and opinions, use your Facebook thing to drop them here. And if this thing isn’t working, hit me up in the WMH General FB group and let me know!